Bin to Bin Transfer
Initiate a bin to bin inventory transfer to manually or automatically schedule inventory to be moved around the warehouse
Bin to Bin Transfers
You can easily move inventory between two bin locations by going into a warehouse and selecting the inventory you want to move. This enables you to 'move' inventory from one bin to another within the system. It also helps to coordinate where inventory is within your warehouse.
To initiate a transfer go into a warehouse, select inventory, and choose a product to transfer. From here you will select which bin to transfer from. you can also go into a bin, find the item and transfer directly from the bin.
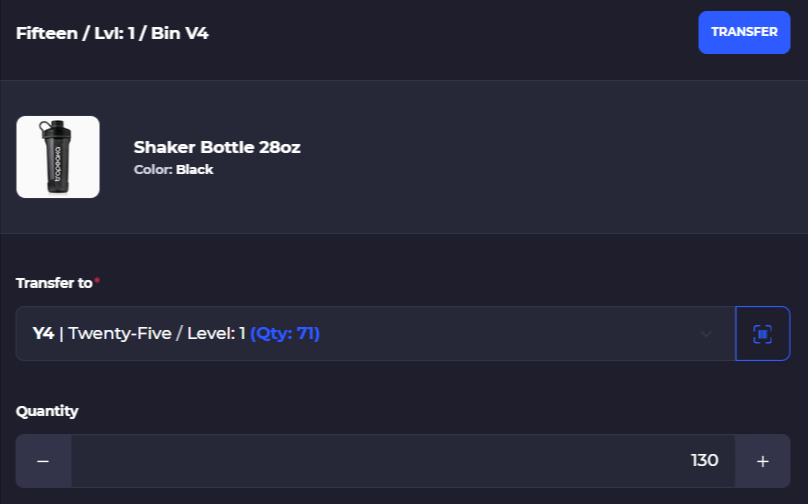
Transfer Icon:
There are four primary methods to transfer inventory between bins:
1) Scan the product using the scan anything button or just scan using a hardware device, click adjust then select the transfer icon, enter the quantity and bin to move to
2) Go into a warehouse > inventory, select the inventory item then tap the transfer icon on the bin you want to transfer from
3) Make an ad-hoc adjustment of inventory, select or scan the product and initiate a transfer on the bin
4) Select or scan a bin location, scroll down to the inventory for that bin and select the transfer icon on the item
Bin to Bin Stock Movement Video
Method 1: Scan Product
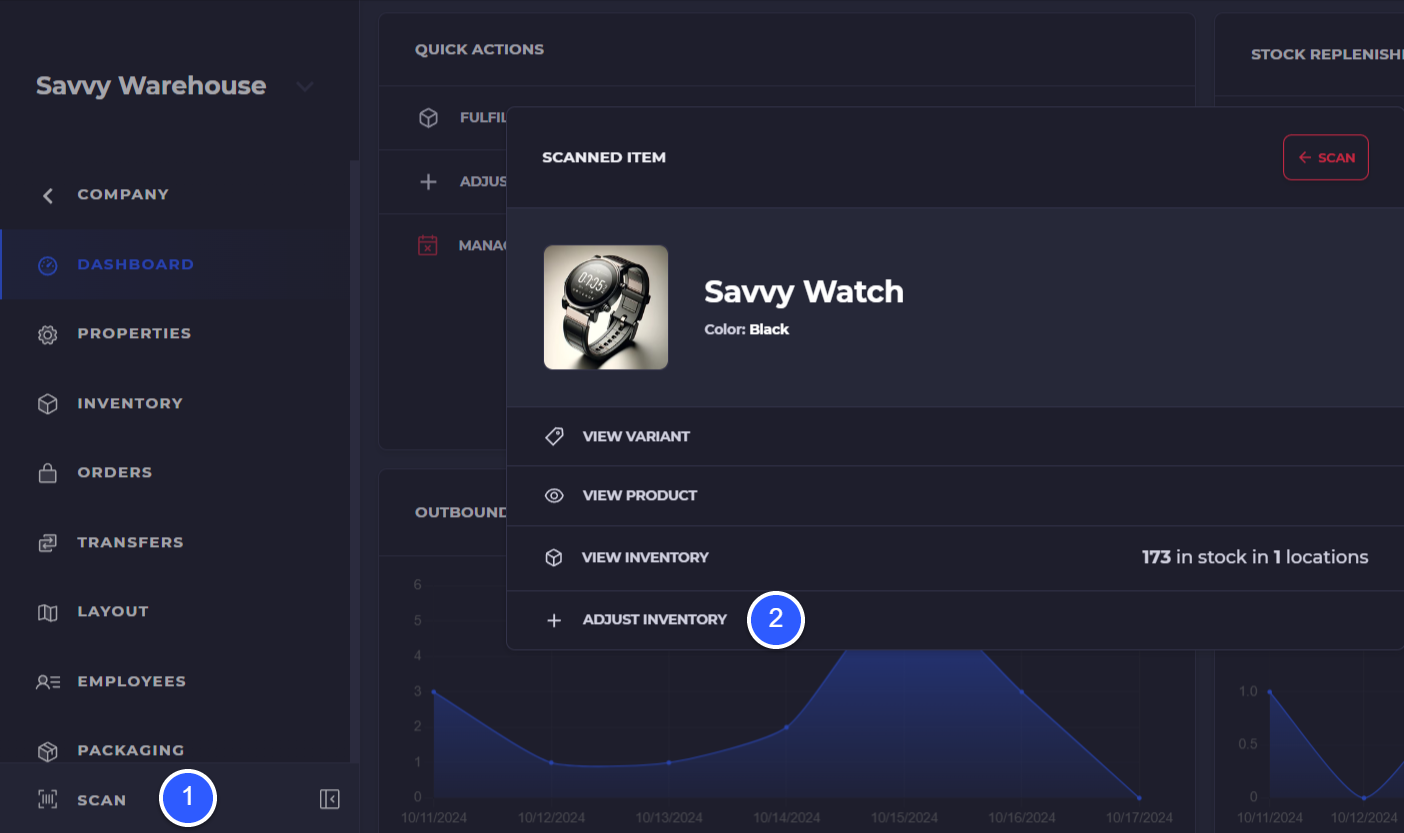
Using this method you will scan the product for which you want to move. Note: you need to be inside of a warehouse on the SKUSavvy interface to bring up the inventory to move.
1) Select the scan icon, or using a hardware scanner simply scan the item from inside a warehouse
2) Select to view the inventory
3) Tap on the +transfer icon to select a new bin and quantity to transfer

Method 2: On the Inventory Item
With this method you can go directly into an inventory item level within a warehouse and move the bin contents on the inventory detail:
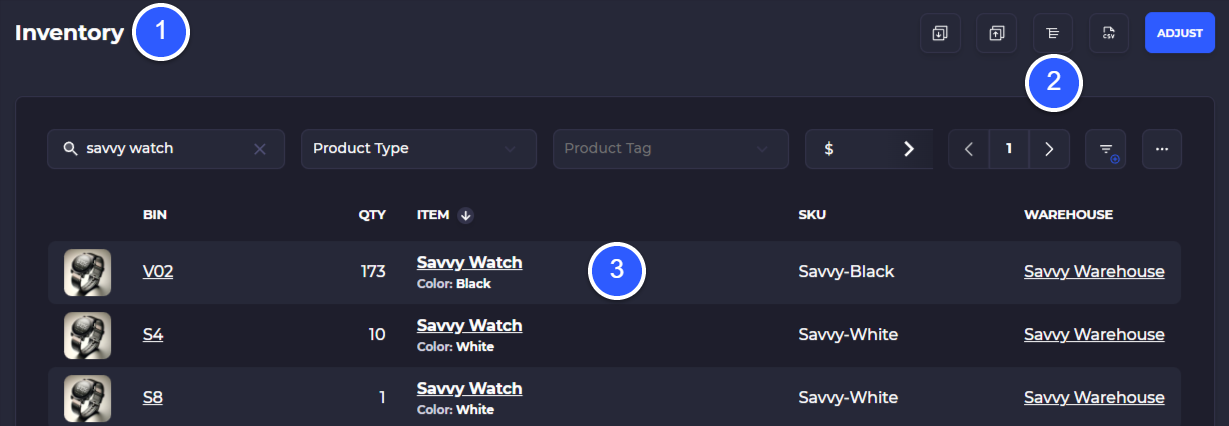
1) Go into a warehouse > inventory > inventory detail record (hint: you can view inventory by product or by flattening the list to view each individual variant)
2) Flatten list view which shows each variant/bin combination on a single line
3) Select the inventory item you want to move
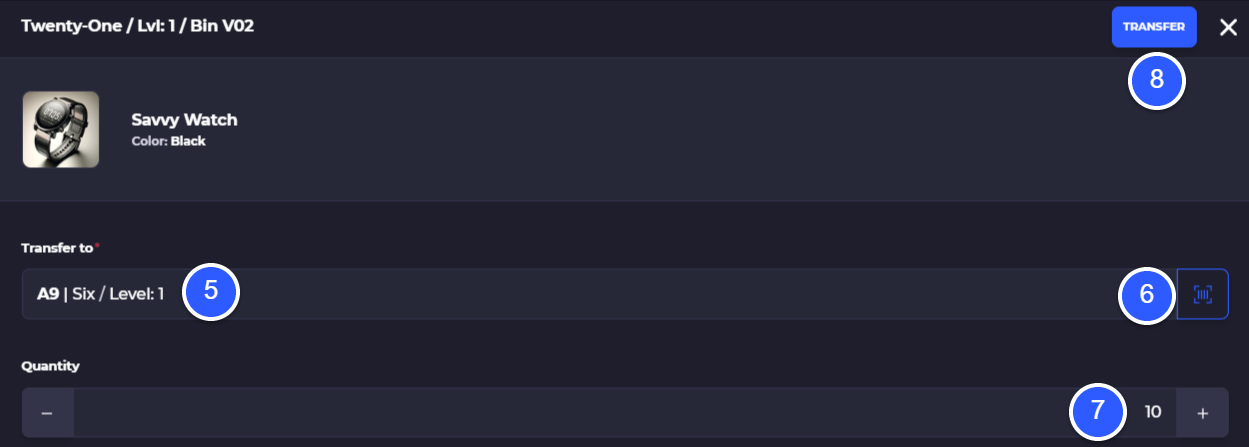
4) Select the transfer icon on the bin containing this item
5) Select the bin to transfer into
6) Optionally scan the bin you want to transfer into
7) Enter the quantity to transfer
8) Tap 'Transfer' to move the inventory

Method 3: Ad-Hoc Inventory Adjustment
In this method of inventory transfer you can directly change the quantities in bins to reflect the moved value of the inventory. From this screen you can also add inventory to a new bin location.
1) Navigate to anywhere your inventory levels are shown and click adjust (hint: most places where you see the inventory quantity you can click on it to make an adjustment)

2) Select which stores products you want to adjust (optional)
3) Select the product and variant
4) Scan a product to adjust
5) Add inventory to a new bin and choose whether or not to sync changes to Shopify
6) Select a bin location or scan a bin to select it
7) Add quantity you want to add
8) Click +/- to make an adjustment, note that for bin movement you would want to reduce one bin, add to the other

Method 4: Scan Bin
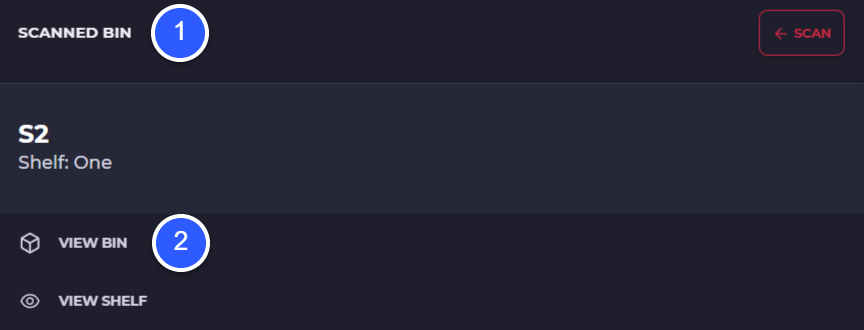
Another easy way of transferring inventory contents between two bins is to move the inventory from within the bin location directly. Here we will scan the bin, though you can also select the bin directly.
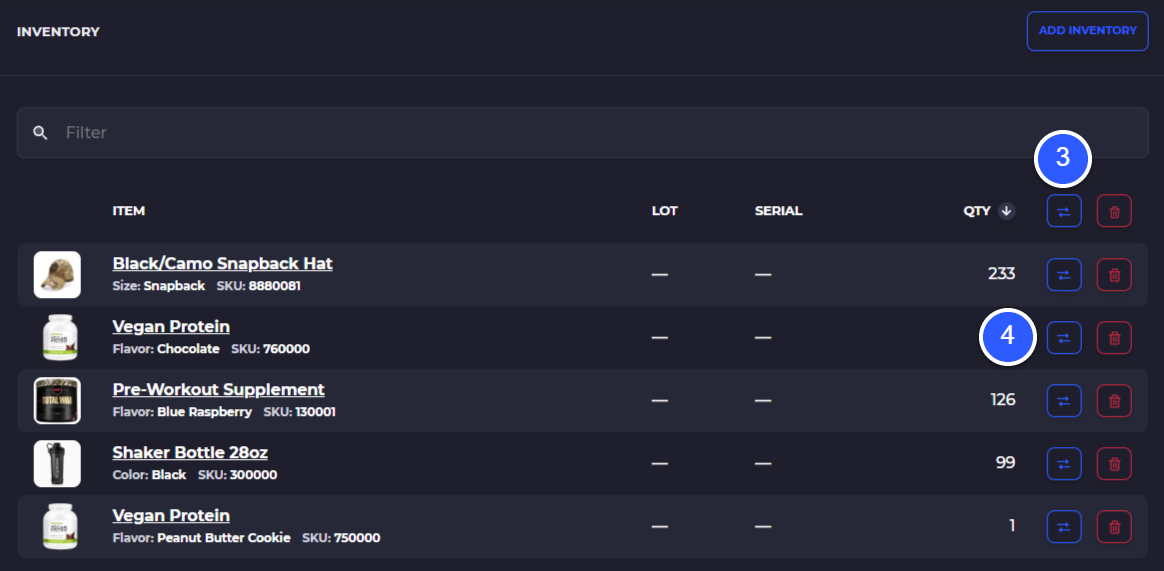
Within the bin you will see all inventory items currently held in the bin with the same transfer icon available to move the inventory into a new bin.
1) Go into a warehouse and scan the bin. You can also go into your layout > bins and select the bin you want to transfer from
2) 'View Bin' if you scanned the bin
3) At the top of the list of inventory within the bin is a button to transfer all or select multiple items to transfer
4) Select the transfer icon on an item to transfer to a new bin
Automated Bin Replenishment
Using SKUSavvy you can set up bin replenishments that automatically trigger when an item gets below its minimum level for that bin. This is helpful when you have holding stock used to replenish pick stock locations.
You must have the inventory item in at least 2 bins to set up a replenishment
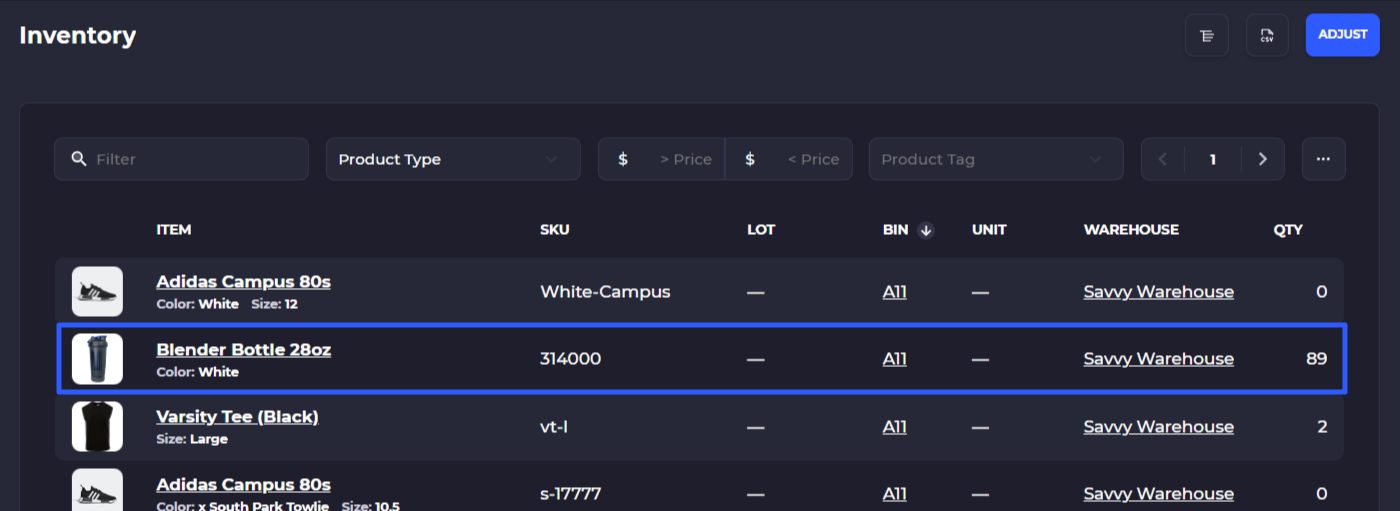
1) Select the Inventory Item
Navigate to a warehouse > inventory and select the inventory item you want to set up a replenishment for. From here, make sure you have at least 2 bin locations for the item.
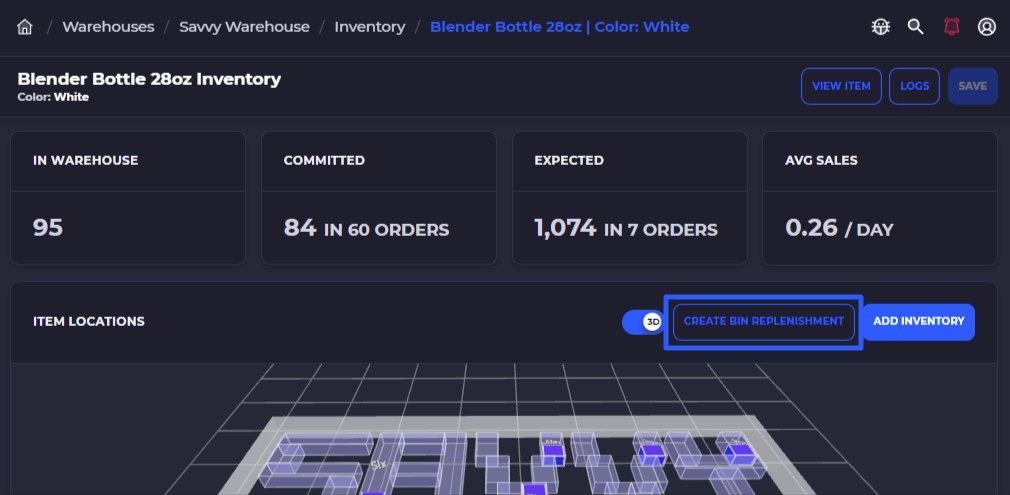
2) Create the Replenishment
Located over the map view of your inventory is a button to 'Create Bin Replenishment' which will enable you to establish a relationship between one or more bins.
After clicking into the replenishment creation, you will see two dropdowns to select the 'From' and 'To' bins. These dropdowns show you locations and current quantities of the inventory in those bin locations. Select the from side (inventory will come out of this bin) and the to side (inventory will go into this bin) then 'Create'.

3) Establish Replenishment Level
Next you'll see on the inventory levels for this item the replenishment tags so you can set the correct minimums for the bin you are trying to replenish.

You MUST set a minimum level on the 'To' inventory level for the replenishments to auto generate
1) Bin/inventory levels being used for the automated replenishment
2) Min/max level to set for triggering a replenishment to happen (when the 'To' bin goes below this level the system will create a replenishment back to the 'max')
3) Current replenishments set on the bins (click to view/delete)

4) Transfer Bin Inventory
With your replenishment levels set, SKUSavvy will start automatically creating the replenishments so you can go through and move stock as needed. Click into the inventory > bin replenishments at the warehouse level to start moving stock.
1) View the items pending transfer to another bin
2) View 'From' and 'To' bins with their current quantities
3) View current and desired minimum stock then click the transfer button to move stock
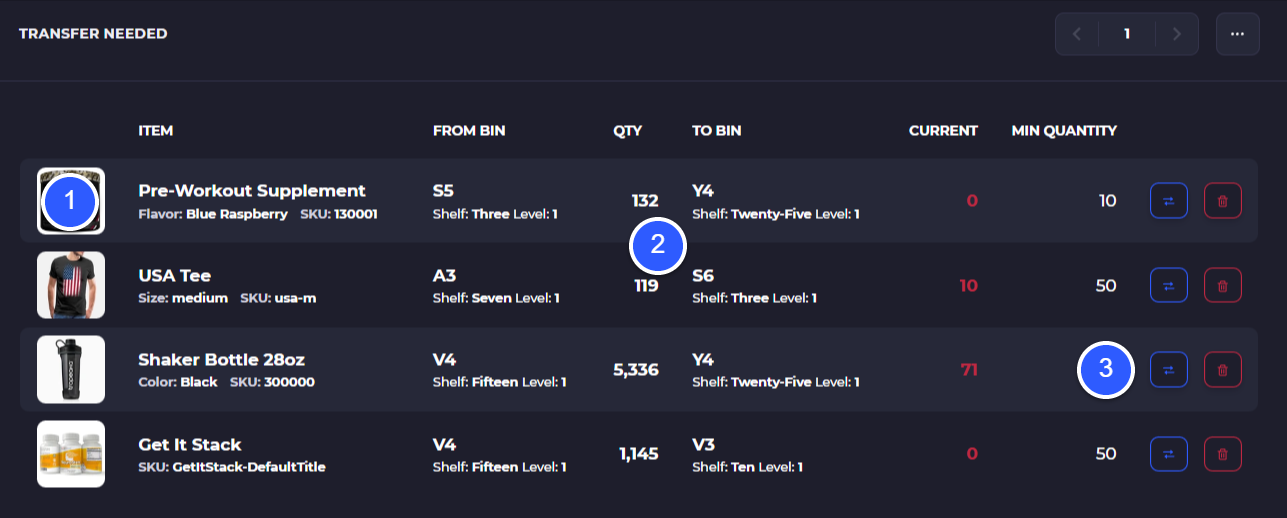
Clicking on the transfer icon will bring up the bin to bin movement where you can enter the quantity you want to transfer.
