Workflow Settings
Find ways to adjust the way things are handled within SKUSavvy. Making changes this way helps to improve the usability of SKUSavvy for your organization.
SKUSavvy Platform Settings
SKUSavvy is a cloud-based inventory management system that helps businesses of all sizes manage their inventory, orders, and shipments more efficiently. One of the key features of SKUSavvy is its ability for you to customize the platform settings to meet the specific needs of each business. Below is each setting within SKUSavvy and the impacts it will have when turned on.
Note: you must have the company admin permission to adjust these settings as they will affect each employee account
Fulfillment
Manual fulfillment (no carrier)
Shopify fulfillment status notification
Order tracking page
Barcodes for order batches
Split order fulfillment
Print pick list
Bulk pack all ordered items
Print license plate for boxes
Ignore order line item properties
Add messages to shipping labels
Inventory
Custom adjustment reasons
Enable bin to bin replenishment
Enable kitting
Track packaging inventory
Retain empty inventory records
Require adjustment reason
Enable serialized inventory
Enable lot tracking
Limit one lot per item per bin
Enable fresh/frozen item management
Show lot expirations as date
Default frozen perishable time
Turn on/set ABC classifications
Scan Settings
Bin scan on pick
Item scan on pick
1 scan = 1 unit on pick
Item scan on pack
Camera scanning
Test mode scanner
Hardware scanning
Prefix to use for scanning
Barcode Settings
Default item barcode
Default batch barcode
Default bin barcode
Default shipment barcode
Generate barcodes for items
Replace barcodes when updated
Default Units
Default length unit
Default weight unit
Display currency
International
Customs declared value
Terms of trade codes
Purchase Orders
Enable purchase order management
Default from email on vendor portal
Enable directed put-away criteria
Enable bulk counting on check-in
Transfer Orders
Enable transfers
Edit closed transfers
Enable bulk counting on check-in
Allow overcounting
Cycle Counts
Enable cycle counting
Require bin scan on count
Require item scan on count
Show expected quantity on count
Data Retention
Set customer retention period before deletion
Workflow Settings Video
Fulfillment Settings
These settings change and enable various parts of fulfilllment as well as the information being sent to Shopify.
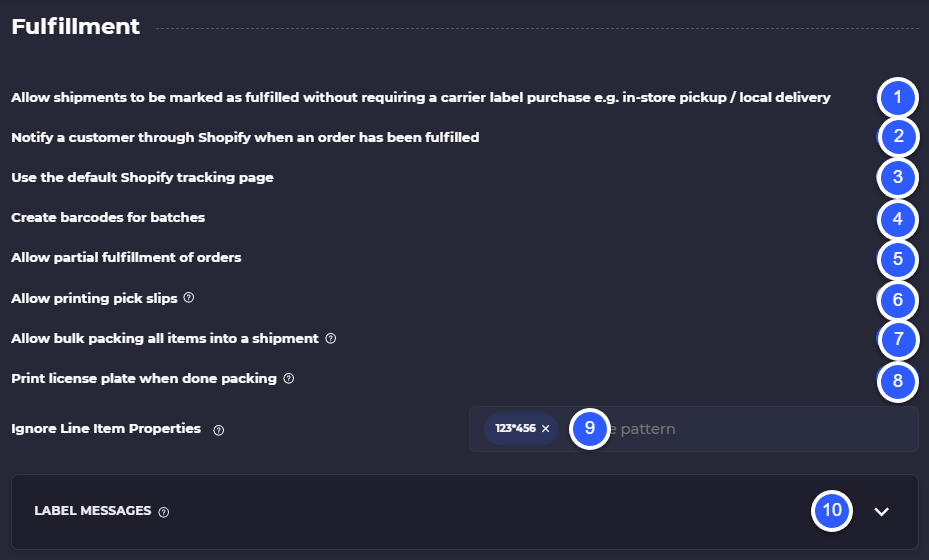
1) Turn on manual fulfillment: which will enable you to package and complete an order fulfillment without needing to produce a carrier label. This still allows you to scan an external tracking number to the order. Useful for delivery orders that are not being shipped via carrier, or using a non supported carrier
2) Turn on customer notifications: Notify customer of a fulfillment event using messaging set up in Shopify
3) Turn off SKUSavvy Tracking Portal - turns off built-in SKUSavvy tracking portal in favor of Shopify tracking page
4) Enable batch barcode creation: printed from within batch settings
5) Enable partial fulfillment of orders: split orders into multiple shipments to fulfill only a part of the order, useful for backorders, multiple shipping addresses, fulfillment across warehouses
6) Print a physical pick list from within the batch. Note: you will need to create a 'Pick list' template for this from within your print templates
7) Allowing bulk packing will enable you to scan an action barcode to pack all items at once instead of scanning each item during the pack stage. Note: you will need to create an action barcode from your templates, then add the action type for 'Pack All items' then simply scan this barcode during fulfillment to automatically pack them all
8) Print a license plate barcode immediately after packing for use with automation systems such as Cubiscan
9) Ignore line item properties: by default SKUSavvy pulls in line item properties from a Shopify order. Depending on the apps you have installed you might be seeing these and they can get quite noisy. If an app is using line item properties but you don't want to show them, you can enter the starting sequence of this apps line item properties to ignore them
10) Label messages: you can assign custom data fields that will show on the shipping labels. Note that only some carriers support custom label messages
Delivery Zones
DEPRECATED
We have removed delivery zones in favor of a more scalable method with Autopilot automated delivery and shipping.
Inventory Settings
Use these settings to customize SKUSavvy according to your own operations requirements. Note that many of the settings shown below will only show if some functionality is turned on such as lot tracking, fresh to frozen product management, and serialization.
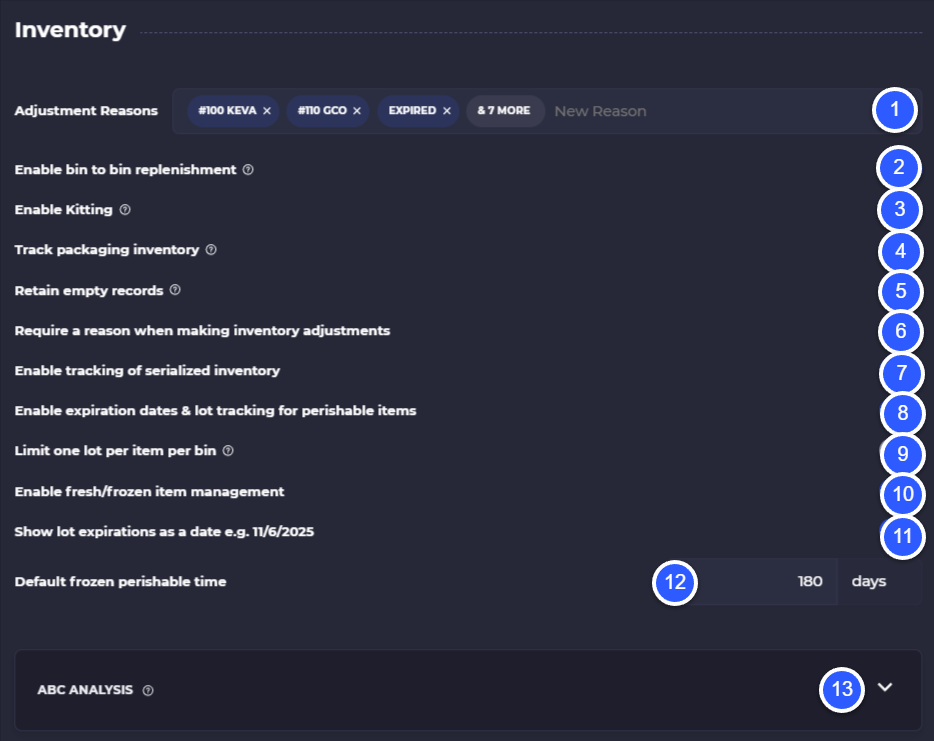
1) Adjustment reasons: when making ad-hoc inventory changes you can provide or require a reason for the change, these codes can be provided for the change reason to track your own custom reasons
2) Enable bin to bin replenishment: this will turn on a setting within any inventory detail to restock one bin from another using automation
3) Enable kitting: this will turn on kitting to set up recipes to convert one or more products into a one or more outputs
4) Track packaging inventory: this will require an inventory quantity for each package type at the warehouse level for it to be used in fulfillment
5) Retain empty records: when turned off SKUSavvy will remove 0 inventory levels and their associated bins
6) Require an inventory adjustment reason: anytime an ad-hoc change to inventory is made this will require a reason be given for the change
7) Enable serialization: this will provide workflows and available restrictions for handling of serialized inventory such as adding serial number during PO creation or check-in, as well as recognizing serial numbers on Shopify POS
8) Enable lot tracking and traceability: for items set to perishable this will require a lot number and expiration date for any new inventory to be tracked all the way through its lifecycle
9) Limit one lot per bin: forces each lot of the same product to be stored in separate bins to error free storage of perishable products
10) Enable fresh to frozen product management: provides a method for converting fresh product into frozen product after the expiration date of the fresh product, also enables lot conversion at the stage of freezing
11) Show lot expirations as date format: you can choose which style of date should be shown for the expiration date
12) Default frozen perishable time: sets an automatic expiration date at the time a fresh item is frozen
13) Enable ABC analysis and set the ranges for which products should be considered A, B, or C class items based on sales velocity
Barcode Scan Options
You have the ability to decide when barcode scans are required during fulfillment. Allowing you to finely tune your fulfillments accuracy/speed to your liking. This includes an optional bin and product scan when picking, and a product scan when packing. It's possible to turn off all scan checkpoints during fulfillment, though we don't recommend it.
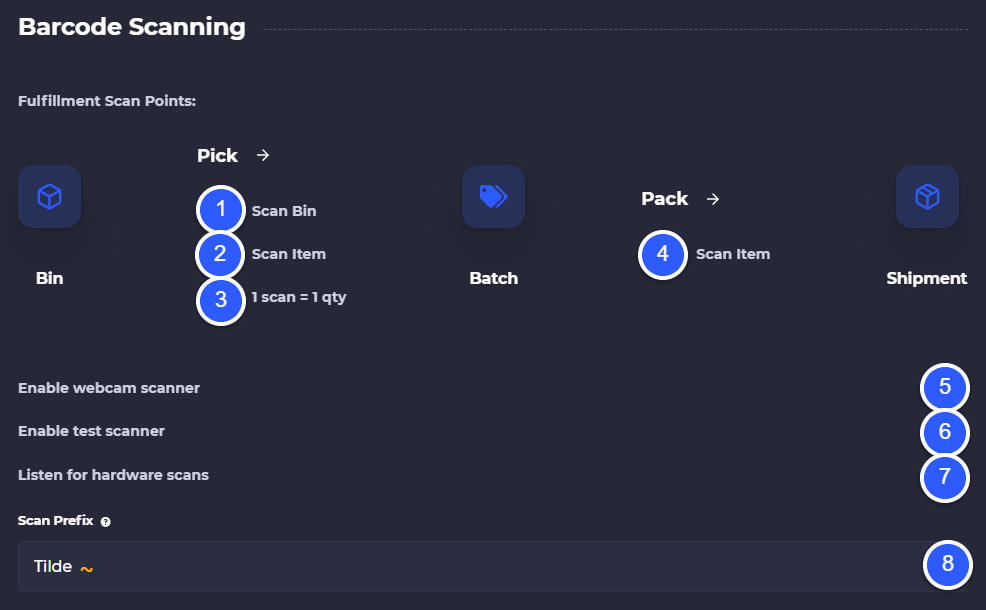
1) Scan bin during pick: requires a user to scan a bin during the pick before completing a pick
2) Item scan during pick: This requires a scan of the item being picked
3) 1 Scan = 1 Quantity: When scanning items during the pick process this ensures each quantity needed is scanned
4) Pack Scan: this requires any user to scan each item in the order being packed
5) Enable the webcam scanner: you'll be able to scan using the camera on any device you are using
6) Enable test scanner: turns on a modal that pops up after any scan click to search for any barcode type
7) Hardware scanning: tell SKUSavvy to look for a Bluetooth style hardware scan as the preferred scanning method, this supports contextual scanning so any page you scan on that is looking for barcode scan input you can just begin scanning
8) Select a scan prefix to recognize coming from a hardware scanner (you must set this prefix on the hardware scanner itself so that it is added to the beginning of any scan made by the hardware)
Barcode Settings
These settings impact the barcode formats for various barcodes being created within SKUSavvy. When changing this setting it will only affect new barcodes created. Existing barcodes will stay in the existing format.
Set your barcode formats as soon as possible so new barcodes are generated in this format (ie. bin barcodes)
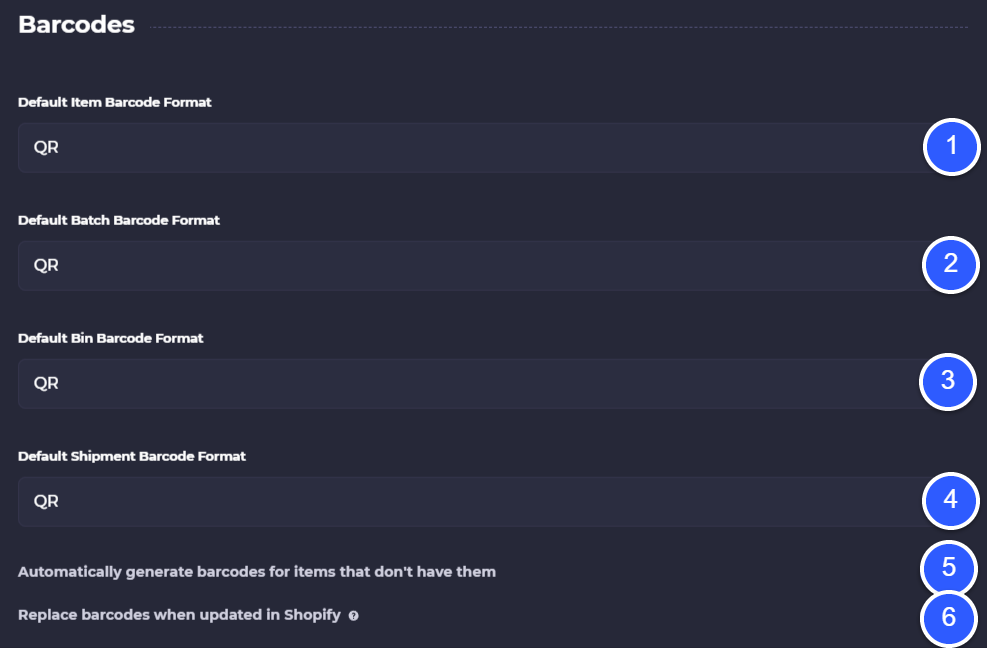
1) Default item barcode format
2) Default batch barcode format (for order batch barcodes)
3) Default bin barcode format
4) Default shipment barcode format
5) Ability to generate barcodes for any items that don't have them, if they have them it will just add another barcode
6) Replace barcodes instead of adding a new barcode when the barcode is updated in Shopify
Default Units of Measure
These will adjust each of the products dimensions, package dimensions, weight units, and any place units are used to be defaulted.
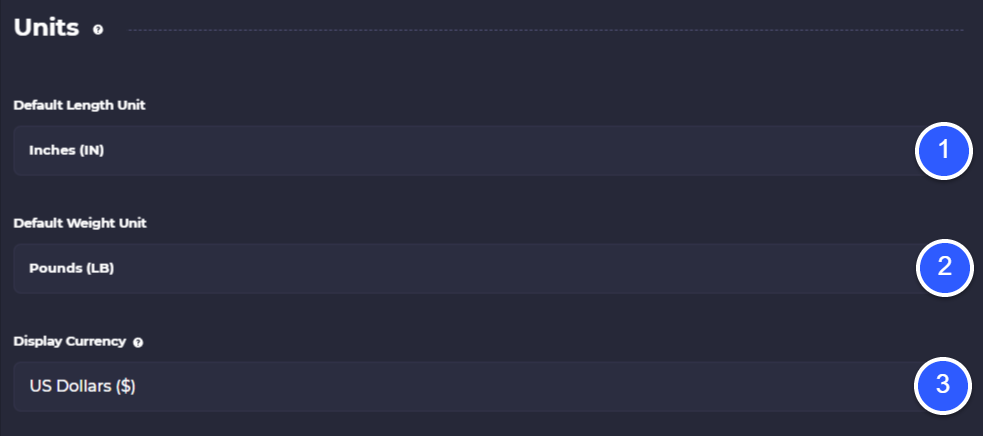
1) Default length unit
2) Default weight unit
3) Default currency
International
If you're shipping internationally the declared value of goods needs to be sent to the carrier for customs. This information is automatically sent by SKUSavvy, however there are cases when you might want to send the discounted value of goods compared to the full value of goods.
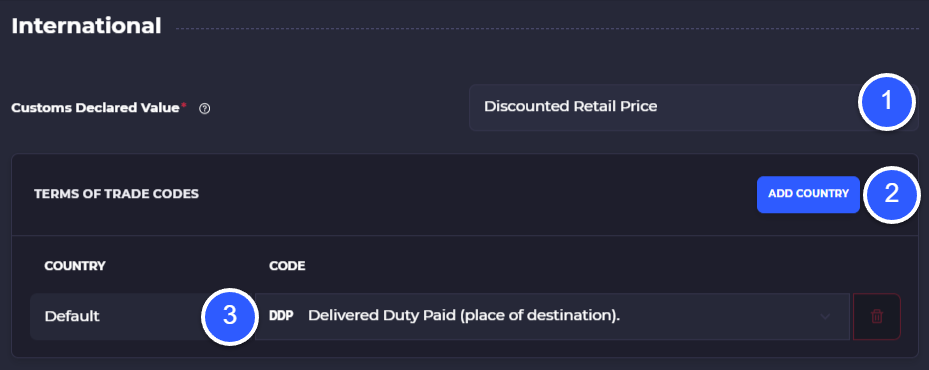
1) Select which value of goods you want to submit to customs: discounted retail price or retail price
2) Select terms of trade codes and optionally set different codes for different countries
3) Select the country and the code to use for each country.
Terms of Trade Codes Available
Purchase Order Settings
This setting turns on purchase orders and vendor management tools within SKUSavvy. From here you can also specify the 'From' email on vendor communication.

1) Enable purchase order and vendor management
2) Set a 'From' email when using the vendor portal
3) Enable directed put-away. Once enabled go to your list of bins for any warehouse and tap on 'Putaway Criteria' to set one or many bins that should be recommended during check-in depending on the product type and crieria set
4) Enable bulk counting of PO contents during check-in so you will not need to scan any products but instead can do this in bulk
Transfers & Cross-Dock Settings
This setting turns on transfers of inventory between two warehouses. Enables you to create transfers inbound or outbound then enables workflows on either side of the transfer to pick/pack/ship and receive the order.
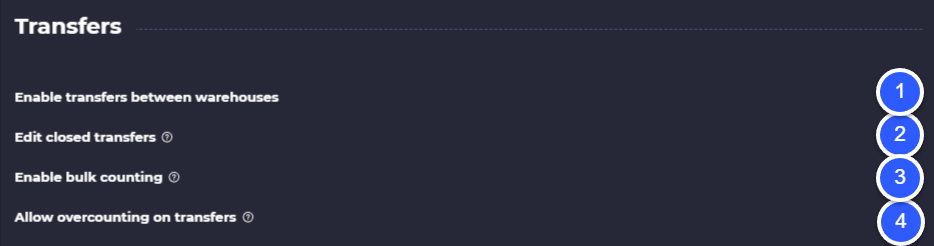
1) Enable transfers between warehouses
2) Enable editing of orders even if the order has already been marked fulfilled and received which may diminish quality control checks
3) Bulk count all items on the receiving side, enables you to still make adjustments
4) Allow overcounting on transfers. May cause discrepancies between what was sent and what was actually received (ghost inventory)
Cycle Count
These settings enable you to control how you want cycle count scans to work as well as what information should be shown during the cycle count process.
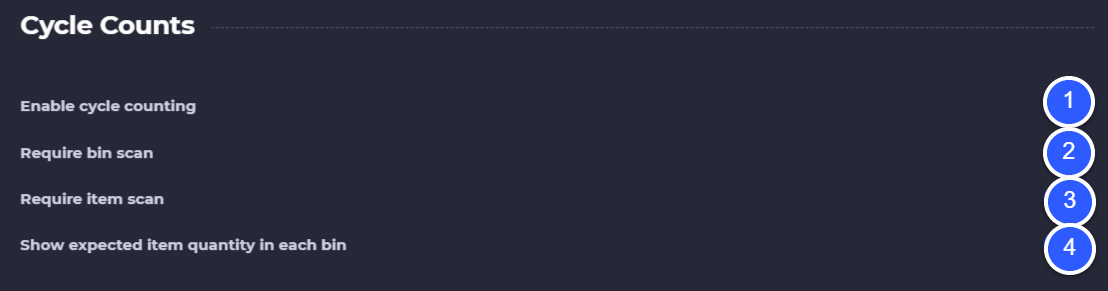
1) Turn on cycle counting (available within a warehouse > inventory > cycle counts)
2) Requite a bin scan on cycle counts
3) Require an item scan on cycle counts
4) Show the expected count during the cycle count (turn this off for blind counting)
Data Retention
If your company chooses to remove sensitive customer data such as customer name, email, and addresses you can have SKUSavvy automatically purge this data after some period of time.
