Orders
Guides to help you with order management within SKUSavvy as well as backorders, and split orders.
Order Overview
Built right into your SKUSavvy account is a powerful order creation tool. You can create orders just as you would with any other point of sale. These orders go into the system as any other order coming down into the system from your channels.
You can optionally place an order within SKUSavvy and have it sent up to a connected Shopify site to manage payments and taxes on the order since SKUSavvy does not handle payments on orders. During order creation you can select the shipping method and also charge for packaging materials as part of the order. This information will be transferred to the order on Shopfy.
Below are the interface controls for the outbound order table.
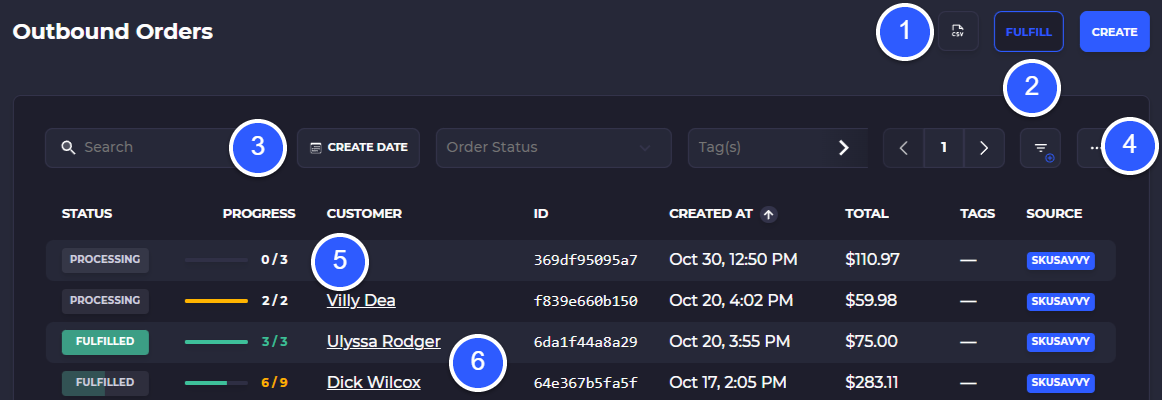
1) Export your orders with applied filters
2) Fulfill existing orders or create a new order
3) Filter orders down based on keyword, creation date, status, tags, order source, and fulfillment location
4) Click through your pages of orders, or enter a specific page to view orders on that page, save preset filters so you can always return to a desired list, change columns shown in the table via the 3-dot menu
5) View progress of the order and sort column headings by clicking on it, click on an order row to view the order detail
6) Click on the underlined customer name to go to that customer profile
Fulfillment Setup Video
This is an overview on orders and how you can manage their fulfillment
How to make order edits in SKUSavvy
Setting up order fulfillment batches
Create Order
When you create an order you will have the option to send the order up to your connected Shopify store, or simply keep the order as a SKUSavvy order. To create an order and have it sent up to Shopify you will simply select which store you want to send it up to (since you can connect more than one Shopify store to SKUSavvy) and then go through the same process as a non-Shopify order.
Next you select a customer and determine which options you want for the order including to send the order up as a draft order, and the option to create a pickup order.
1) Option to create the order as a draft
2) Option to create the order as a pickup order (does not require a shipping address)
3) Add a new customer during order creation
4) Optionally select a connected Shopify store to send the order up to
5) Select a customer and shipping address location

Add Items to the Order
Next you'll add items to the order or import the items for an order. At the top of the order form you'll see a variety of filters to find the right products easily.
Order Creation Filters
1) Select which warehouse you want to view inventory for
2) Import the producs you want to add to an order. You only need SKU, Quantity as part of your import file
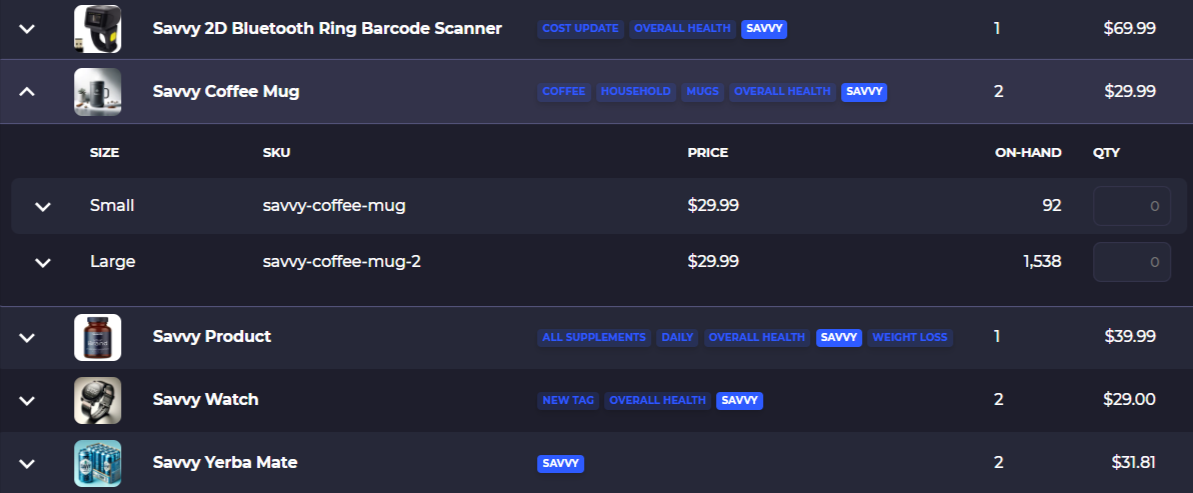
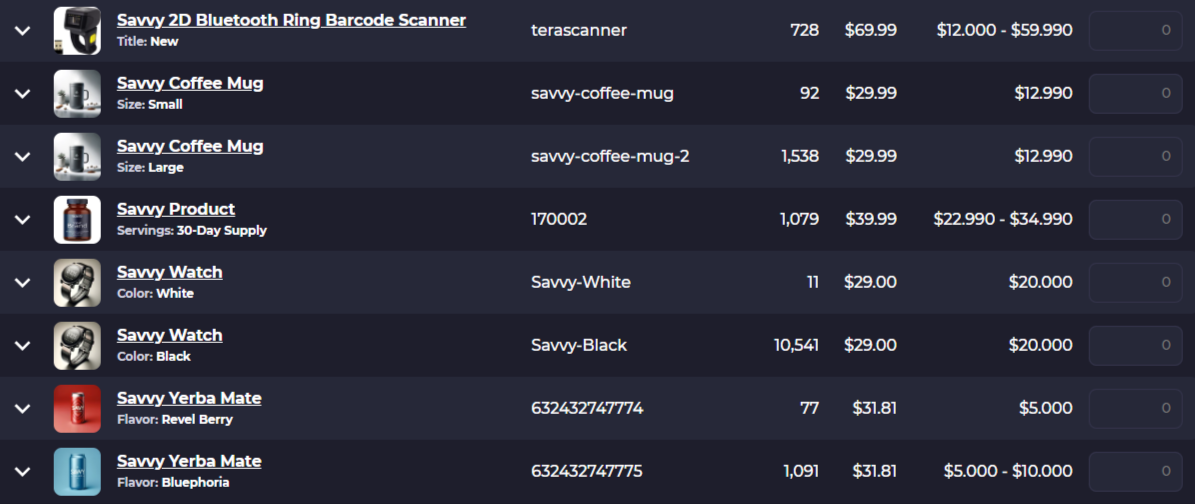
3) Toggle between a flattened item list view or grouped list view which shows each variant on a single line or each product with variants folded up (flattened list view is easier to order)
4) Enter filters: text search, product type, price, cost, tag
5) Use the caret icon to scroll over the filters
Paginate through your products with the number counter

Grouped View
Flattened View
Item View
When adding items to an order you can open the item card to see inventory information related to the product. To access inventory information for the item simply click on the caret icon.
1) Click the caret icon to pull down on any item. While viewing the grouped view you will need to click on the caret icon for the product, and again for the variant you want to view details on
2) Variant details including the product name, variant option, SKU, inventory, price, cost.
2.A) Click on any column header to sort A-Z, Z-A
3) Enter the quantity of this item for the order
4) View the inventory par levels and current level of stock
5) View the total quantity available for the current warehouse, committed stock (click on this value to view the open orders), expected inbound stock (click to view POs), and average sales per day

Packaging & Shipping
The next step is to select the packaging and shipping method. When you create an order on SKUSavvy you can optionally charge for packaging materials. Packaging and costs for packaging should be set up before placing the order.
1) Option to charge for packaging (adds a line item to the order for packaging costs)
2) Select the package for the order
3) View the 3D placement of items in the package

Once a package is selected SKUSavvy will pull rates across your carriers. You can select a rate and SKUSavvy will add the shipping costs to the order, though the shipping is not actually charged at this step, instead you will purchase shipping during fulfillment in case you need to make any changes.
Shipping costs are added to the order total sent to Shopify
Set up shipping automation rules to limit rates that are shown during fulfillment.

Order Discounts
You can add order discounts and line item discounts on the order summary at the bottom of the order form.
1) Click on a line item to bring up the line item discount
2) Enter an order note
3) Add a discount on the order total

Line Item Discount
Click on a line item in the order to provide a discount.
1) View the new item price after discount
2) Select a percentage or fixed cost discount
3) Enter the title of your discount
4) Enter a note on the discount

Total Order Discount
Click on 'Add Discount' to add this
1) Enter a flat or fixed price discount on the order total
2) Enter a title for the discount
3) Enter a note for the discount

Complete the Order
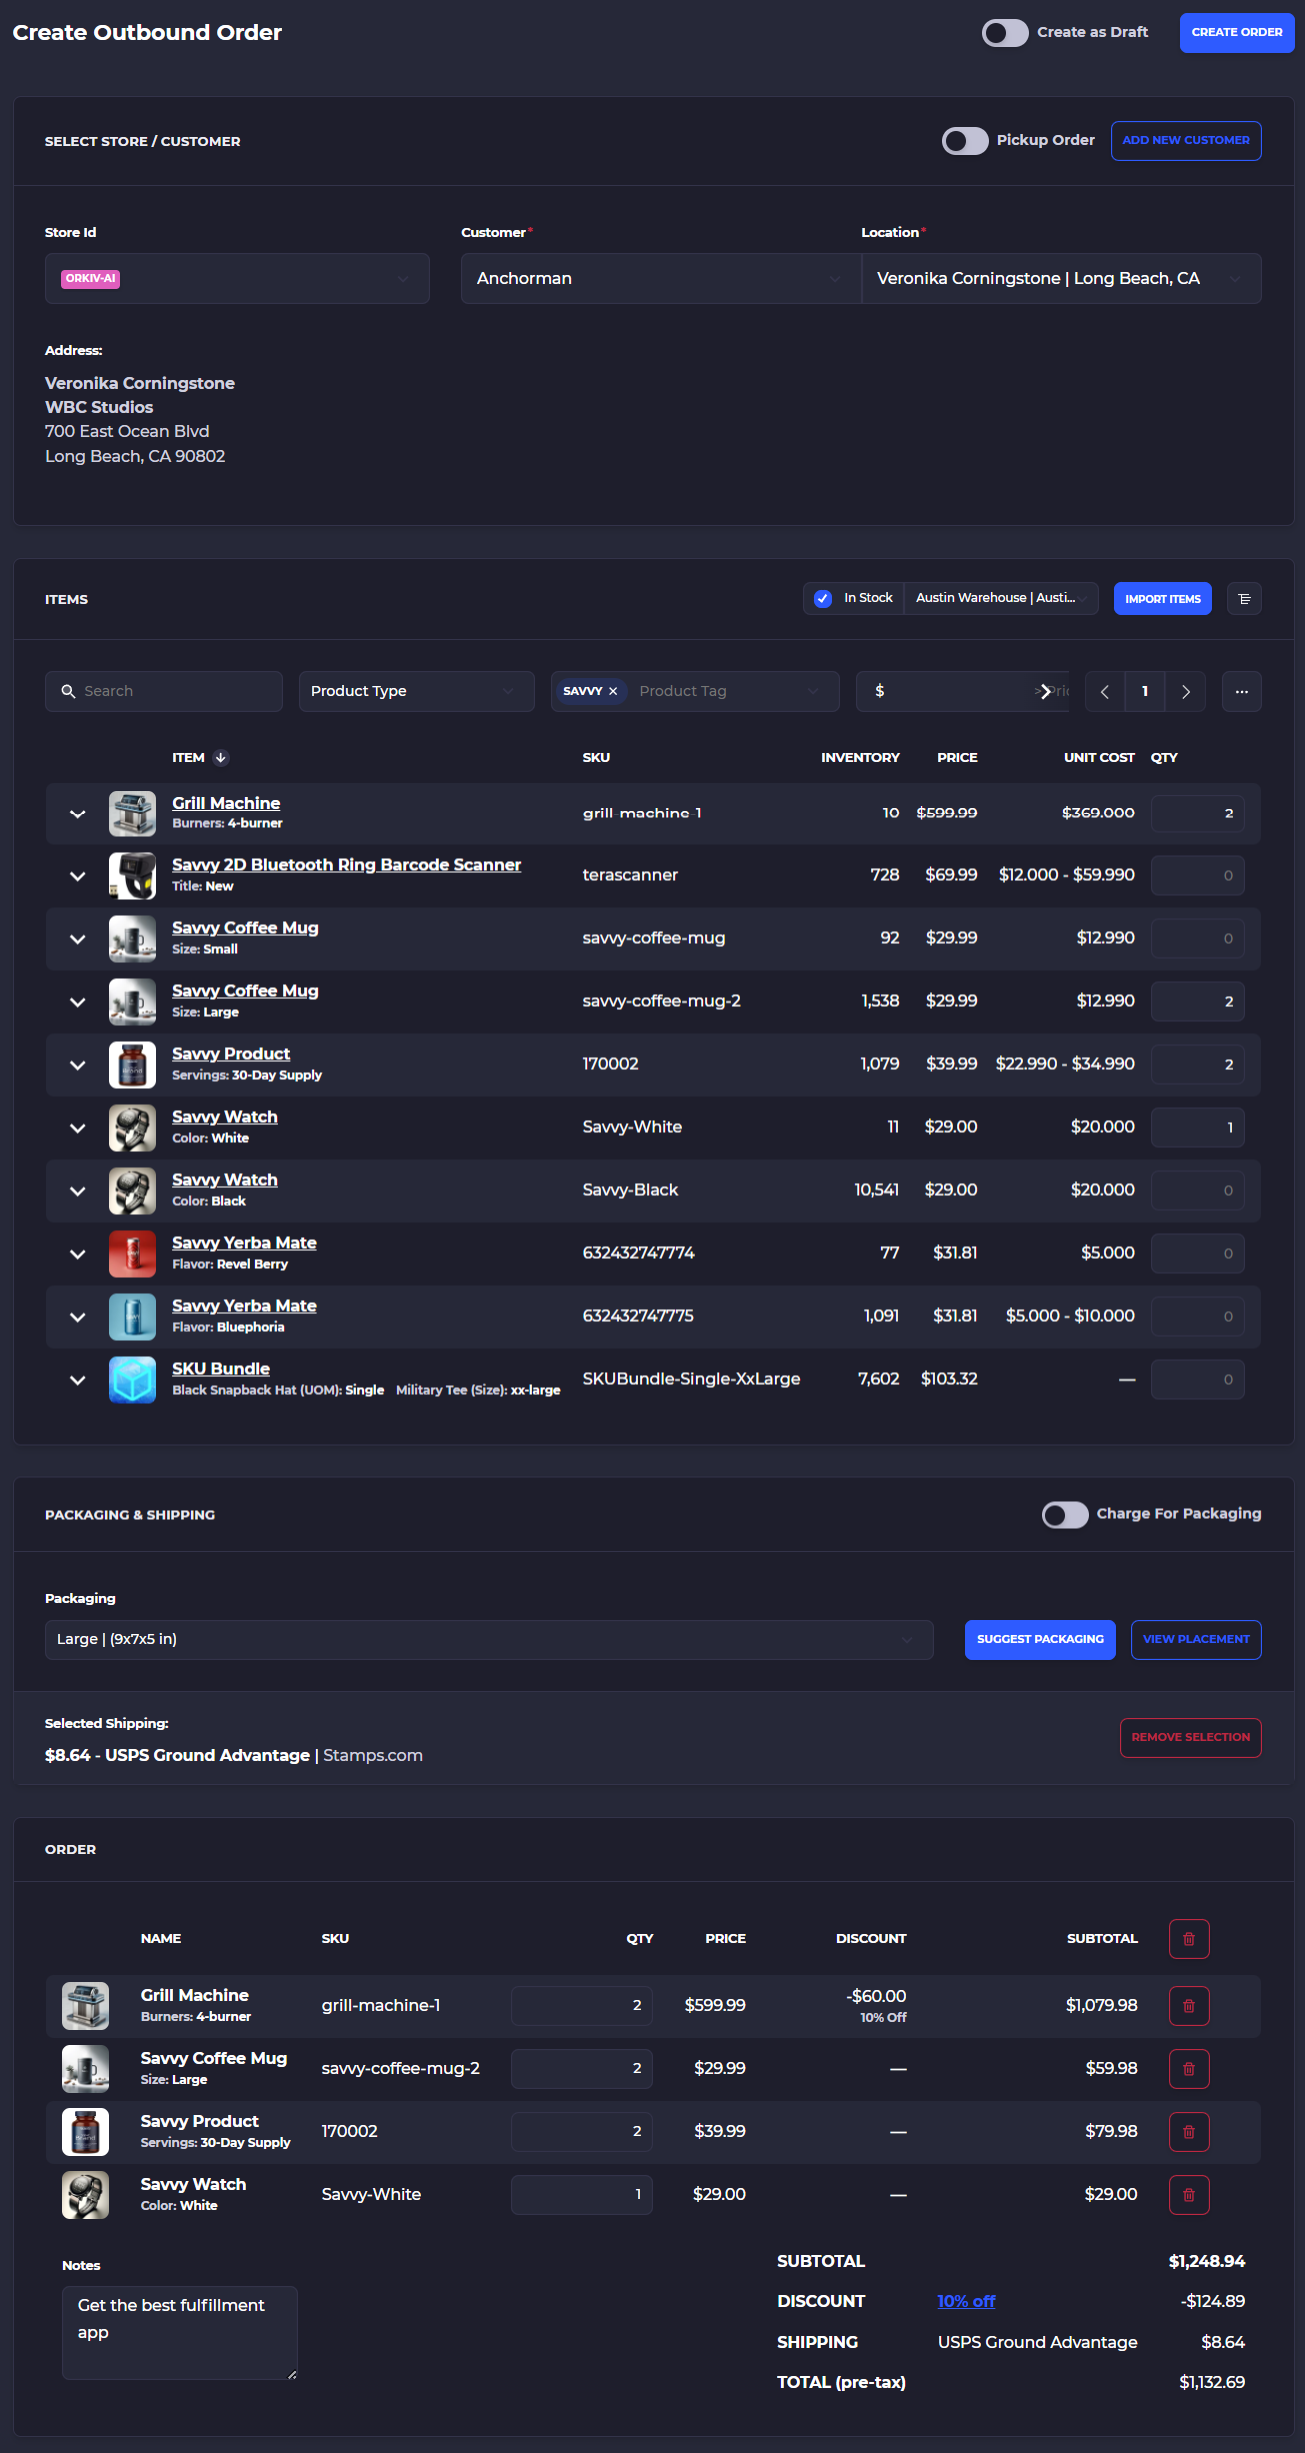
If everything looks good with the order it will look something like the order form below. You can click on 'Create Order' to generate the order and if selected SKUSavvy will send the order up to Shopify where it will appear as any other order within Shopify.
Back Orders
This is an order type that includes an item within the order, or all items in the order are currently not in stock. When an item is marked as being on back order it will not show up as a fulfillable order. If one order contains items that are in stock and others that are on back order, the in stock order items can still be picked, packed and split shipped, then the order remains open, and when your item is back in stock you can revisit the order to complete with a new shipment.
1) Access the product variant you want from Products > Product > Variant > Properties
2) Check the 'Variant is backordered' flag
3) Save the adjustment (keep in mind all fields not currently filled in will need to be added now)

The next step in managing back ordered stock happens when you have an order placed containing a back ordered item.
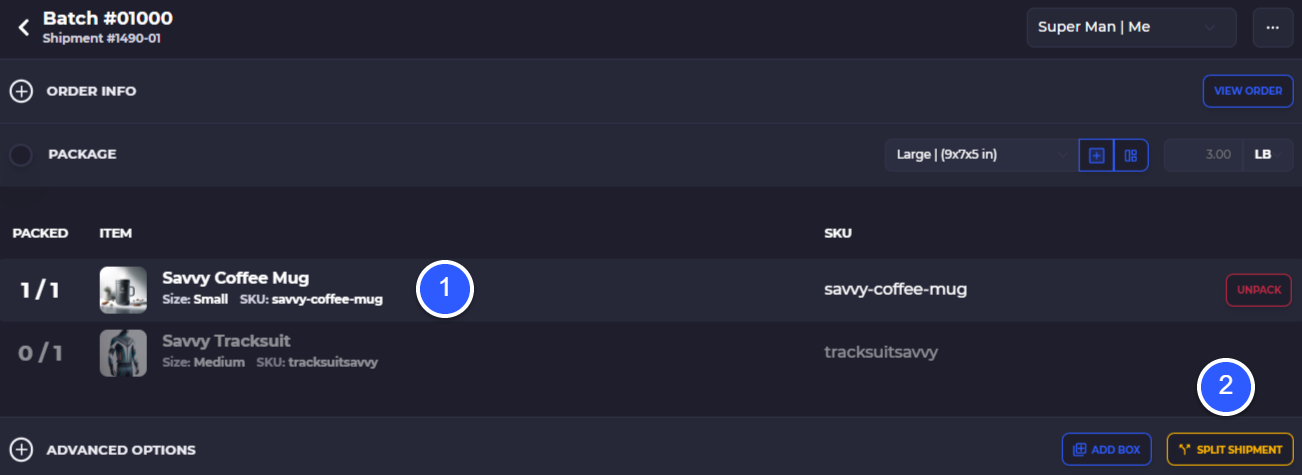
1) Fulfill the order if it contains both a backordered item and other non-backordered items
2) Split the shipment (post pick & pack)
Split Order Shipments
When you have a backorder item within an order, you or need to ship some items separately for other reasons, SKUSavvy enables you to split a shipment during fulfillment. To split a shipment you first need to turn on the global setting for split shipments.Go to your global settings
1) Select your company Properties > Global Settings
2) Check the 'Allow Partial Fulfillment of Orders' option then 'Save'

Next you just need to go through an order fulfillment and only package part of the items. Once you have done this, a 'Split Shipment' option appears to complete one order shipment. The order remains in a 'Partially Fulfilled' status so you can return to it at anytime.
1) Go through a pick & package part of the order
2) Select Split Shipment to create a secondary shipment for fulfillment later on

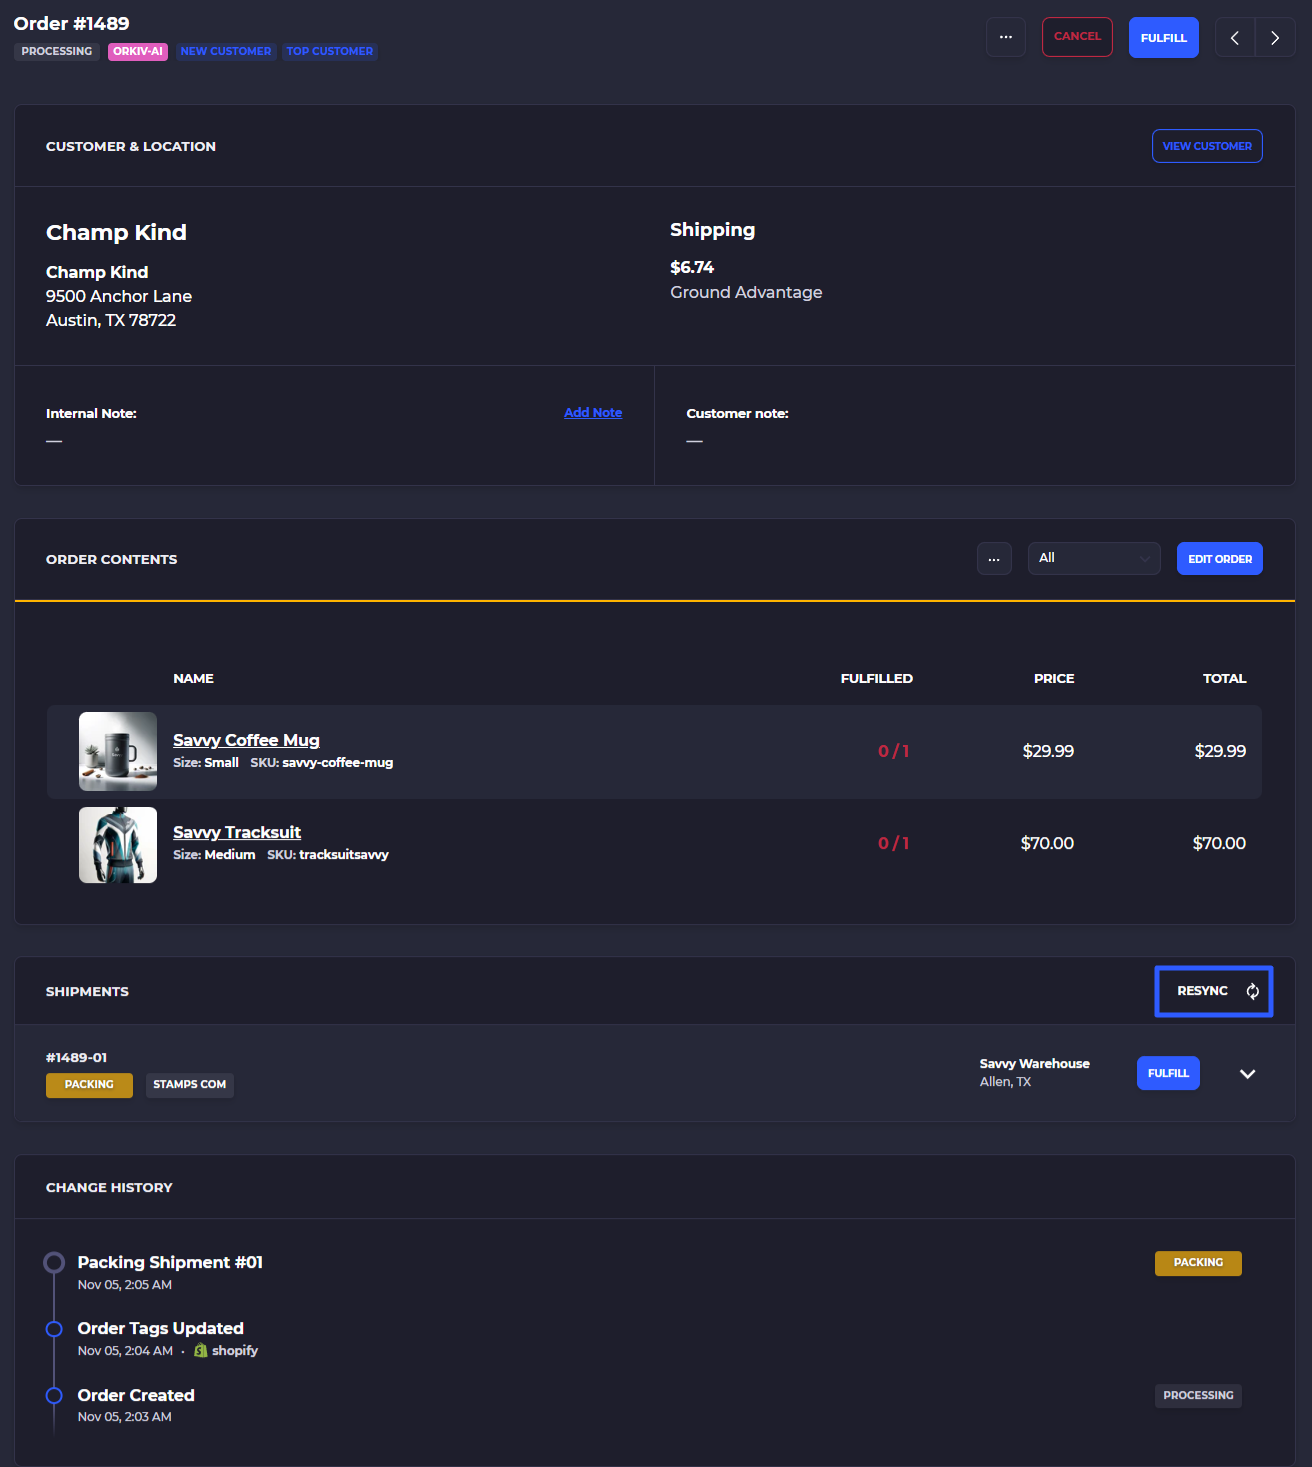
Refresh Order Status
If you see that an order has come into SKUSavvy and it is not updated to the correct status, you may need to refresh the order. You can do this by looking at the order details, scrolling down to the shipments and selecting the refresh button.
