PO Approval Workflow
A purchase order approval workflow that enables your vendors to confirm, edit, or cancel purchases and keep your information accurate.
PO Approval
With every SKUSavvy account, you have the ability to send off a copy of a purchase order to your vendor who can then view, edit, and cancel the PO. In this guide, we'll go through the steps to enable this, and what it looks like from the vendor's point of view.
Step 1: Turn on Email Communication for a Vendor
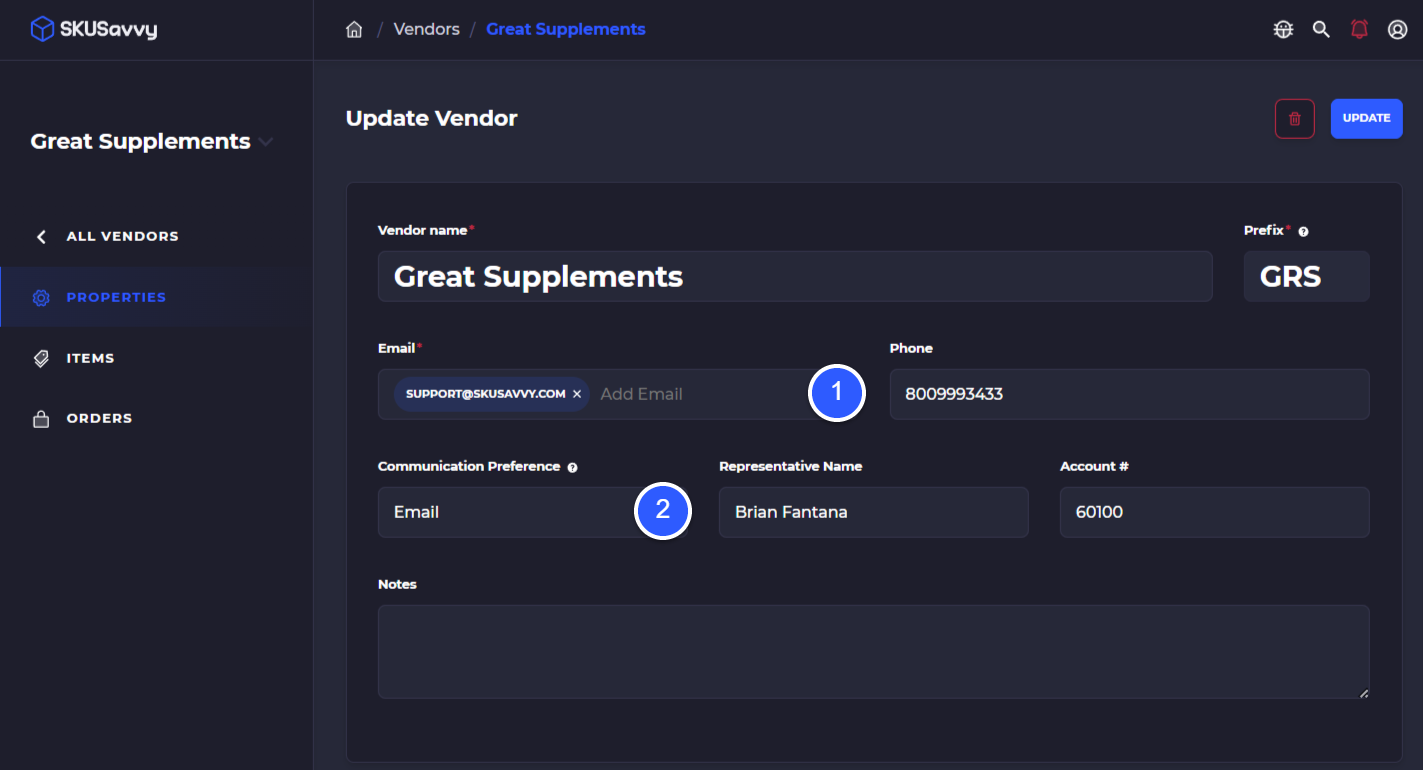
To start sending POs to vendors, confirm that the vendor has the necessary permission turned on by going into the vendor details and selecting the communication preference.
1) Add at least one email to the vendor
2) Turn on vendor communication by selecting from the dropdown

Step 2: Place a PO
Place a purchase with the vendor using one of two ways:
Vendors > select vendor > orders
Select a warehouse > orders > inbound

Vendor Portal
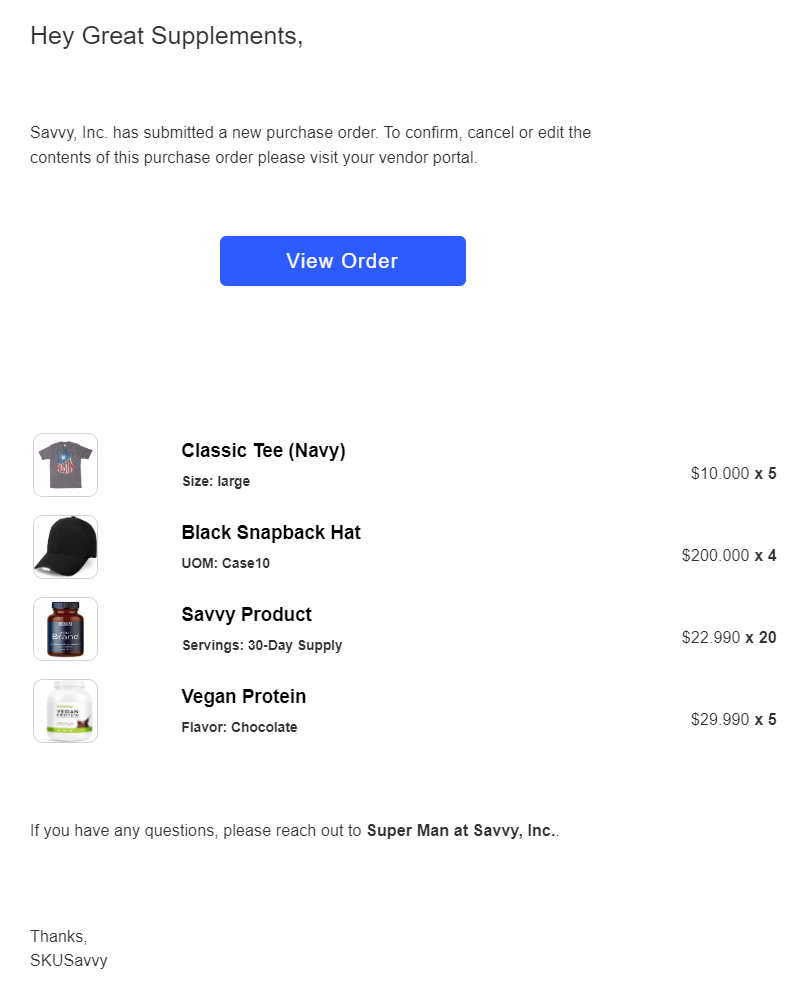
With email communication preferences turned on for the vendor SKUSavvy will now automatically form and send an email for any PO placed with this vendor. The email will show the vendor the PO#, quantities, and items contained in the order as well as an invoice for their records that can be saved/printed.
Email Sent to Vendor

Vendor Portal View
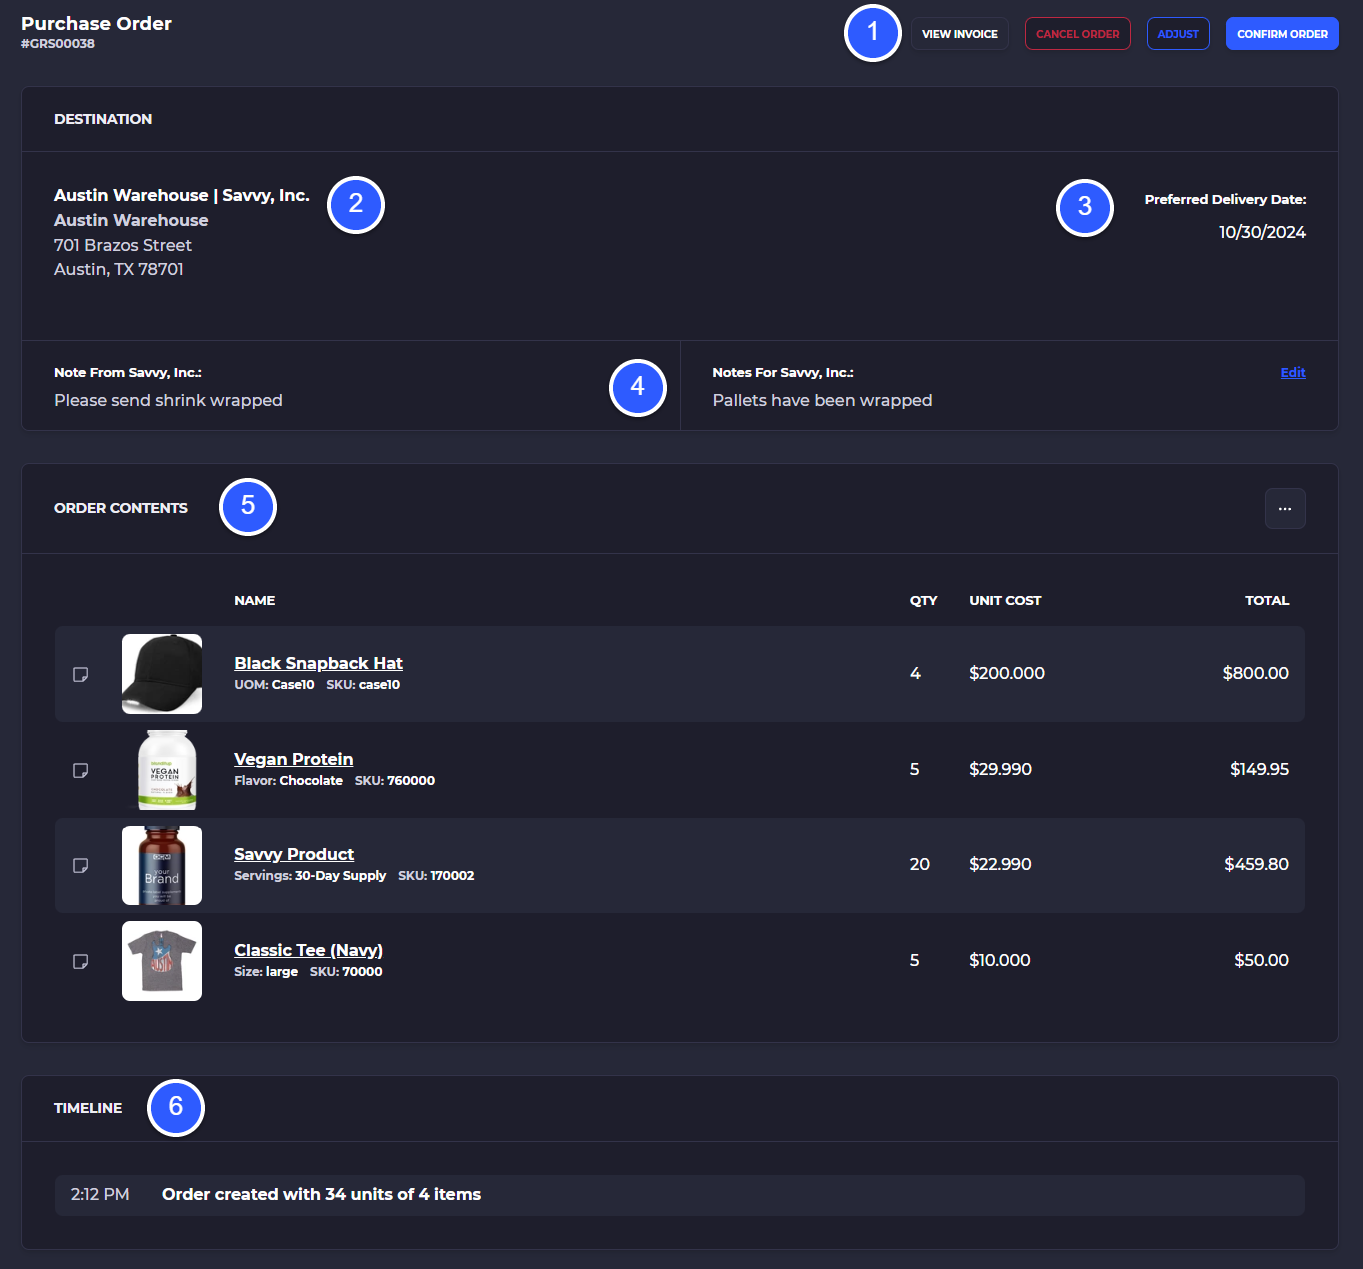
When your vendor clicks the link they will be taken to a portal that can be seen below:
1) View the purchase order and print it out, cancel the PO, vendor adjustments, confirm PO
2) Address the vendor should be sending the PO
3) Your set delivery date for the PO
4) Notes from your company and notes from the vendor
5) Purchase contents
6) Timeline of all changes

PO Adjustment
From within the vendor portal adjustments can be made to quantity and cost
